FEATURE
Accelerating Collaborative Sustainability in the Tapes Industry
Top-Three Flashing-Tape and Window-Installation Mistakes and How to Fix Them
Opportunities to increase market share will increase when companies are pre-positioned for growth in a resilient and scalable way.
Top 3 Flashing Tape and Window Installation Mistakes — and How to Fix Them
By Lisa Anderson, Founder and President, LMA Consulting Group
By Rich the Remodeler with Remodel Lancaster, Lancaster, Pennsylvania
Failure to properly install flashing tape can lead to air infiltration, water damage, and compromised energy efficiency.
After decades in the field, I've seen too many window installations fail, and not because of poor-quality windows, but because of improper flashing tape application. I've favored FrogTape™ Pro Grade Flashing and Waterproofing Tape for all of my jobs, but even using the best, you have to use it correctly to prevent mistakes. Failure to properly install flashing tape can lead to air infiltration, water damage, and compromised energy efficiency. Here are the three most common mistakes I encounter along with measures to correct them.

Mistake #1: Applying Flashing Tape Over House Wrap
This is perhaps the most common error I see. Contractors roll house wrap across the entire window opening, cut 45-degree angles at the corners, fold it in, and staple it down. Then, they apply flashing tape on top, thinking they've created a proper seal. The problem? This creates a direct path for water and air to infiltrate around the corners, even with tape over it.
The Fix:
Cut the house wrap back two inches from the rough opening on all sides before installing any flashing tape. This exposes the oriented strand board (OSB) or plywood substrate, allowing you to create a proper seal directly to the structure. Start with your sill piece, applying it inside the window jamb and extending it three inches out over the substrate and onto the house wrap using the bow-tie method in corners when necessary. This creates multiple layers of protection and eliminates that critical failure point at the corners.
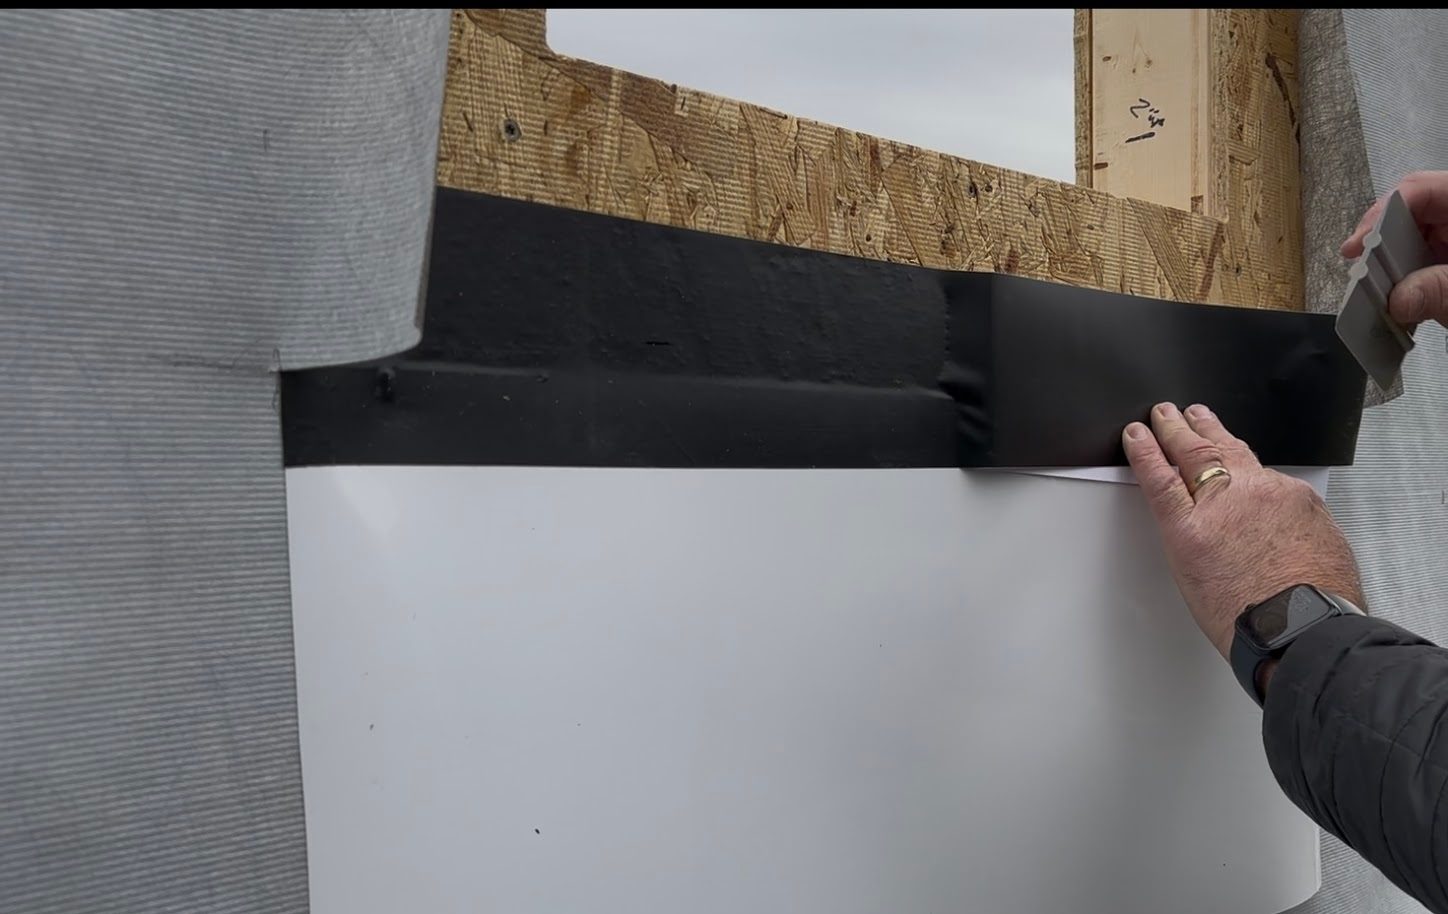
Image 1: Cut the house wrap back two inches from the rough opening.
Mistake #2: Installing Windows First, Then Flashing
I recently saw a job where the contractor installed a new construction window with the nail flange over the house wrap, then applied flashing tape on top of everything. This backward sequence means every nail or screw penetration is a potential leak point, and water can still get behind the nail flange.
The Fix:
Always apply your first layer of flashing tape before the window goes in. When you install the window over properly applied flashing tape, the tape acts like a rubber gasket around every fastener. Each nail or screw that penetrates through the nail flange self-seals because the tape's acrylic technology creates a watertight bond. Then apply your second layer of tape over the nail flange, leaving the bottom open for drainage in most applications, and you've created a truly secure installation.
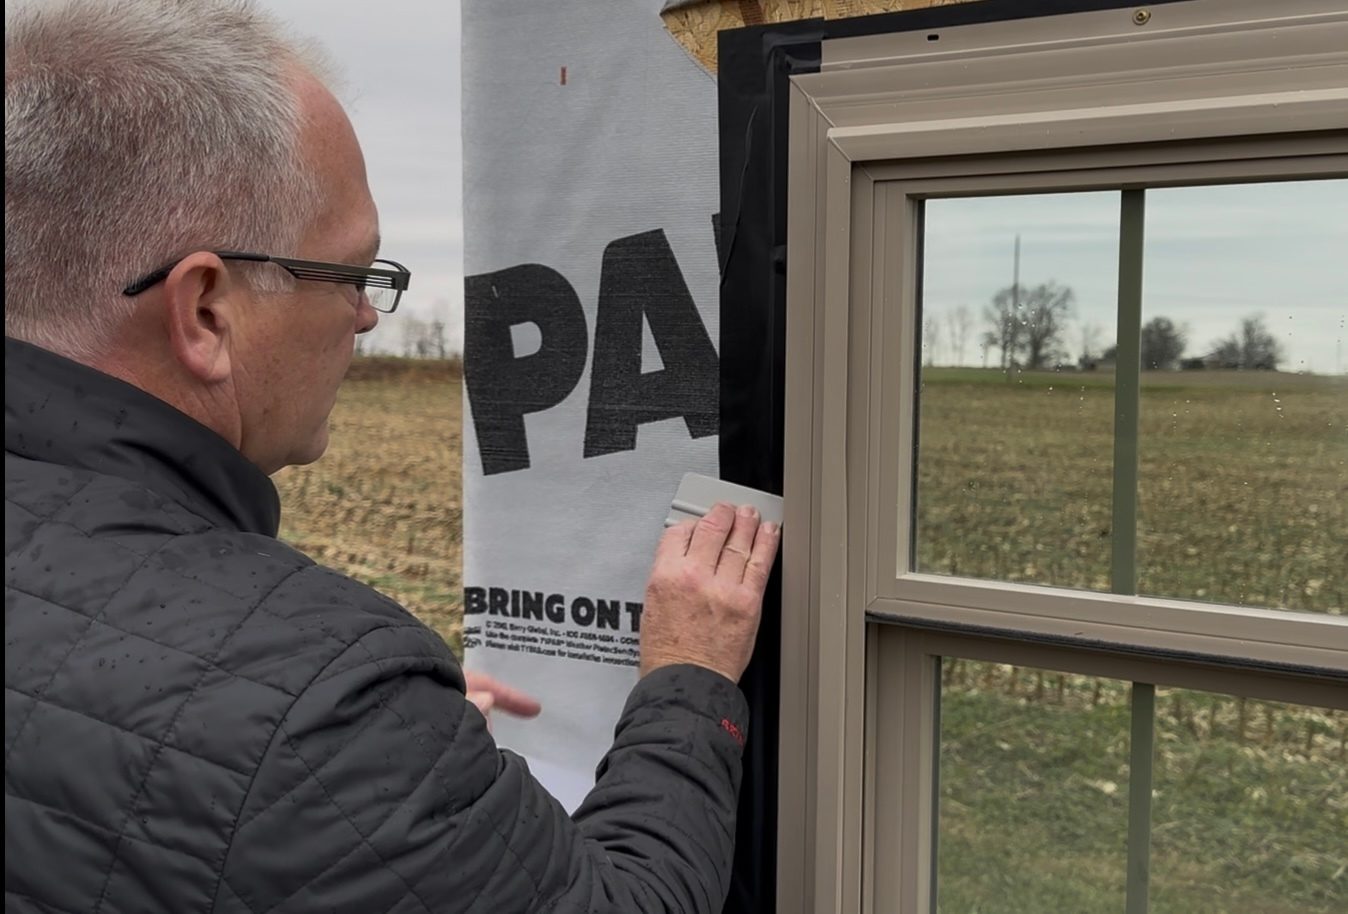
Image 2: Always apply your first layer of flashing tape before the window goes in.
Mistake #3: Ignoring Environmental Conditions
Not all flashing tapes are created equal, especially when it comes to temperature. I've watched contractors try to install standard tapes in November when it's too cold for proper adhesion. Others use thicker tapes that won't conform to corners, forcing them to nail through the material, creating the very penetrations the tape is supposed to prevent.
The Fix:
Use a high-quality acrylic flashing tape that can be applied in cold weather and conforms to surfaces without mechanical fasteners. The tape cures after 72 hours to various substrates such as vinyl, stone, masonry, or wood, even in challenging conditions. I've successfully installed windows using quality acrylic tape in cold winter weather, creating seals that stand up to extreme coastal conditions for years. The right product should perform even in sub-zero temperatures, adheres in wet conditions, and can be repositioned two or three times during installation if necessary.
Beyond the Basics
For extreme environments like oceanfront properties or areas with severe dust storms, consider sealing all four sides of the window completely rather than leaving the bottom open. And don't forget the interior: spray foam around the window on the inside adds another layer of protection and significantly improves energy efficiency.
The key to successful window installation isn't just about following steps, it's about understanding why each step matters. When you cut back that house wrap, apply tape in the correct sequence and choose materials that perform in real-world conditions, you're not just installing a window. You're creating a durable, energy-efficient envelope that will protect the home for decades to come.
Stop putting house wrap underneath your flashing tape. Your customers — and their utility bills — will thank you.
Learn more about Rich the Remodeler at remodellancaster.com. Additional information about Shurtape is available at shurtape.com.
Article images courtesy of Rich the Remodeler.